How to install LibreSpeed on your Pi4

09/11/2023

If you want to test your local network speed, but not the Internet provider speed, most likely you should host your own speedtest "server". If you happen to have a Raspberry Pi (Pi4 in my case), things can be pretty easy.
Here comes LibreSpeed - Self-hosted Speed Test for HTML5 and more. Easy setup, examples, configurable, mobile friendly. Supports PHP, Node, Multiple servers, and more.
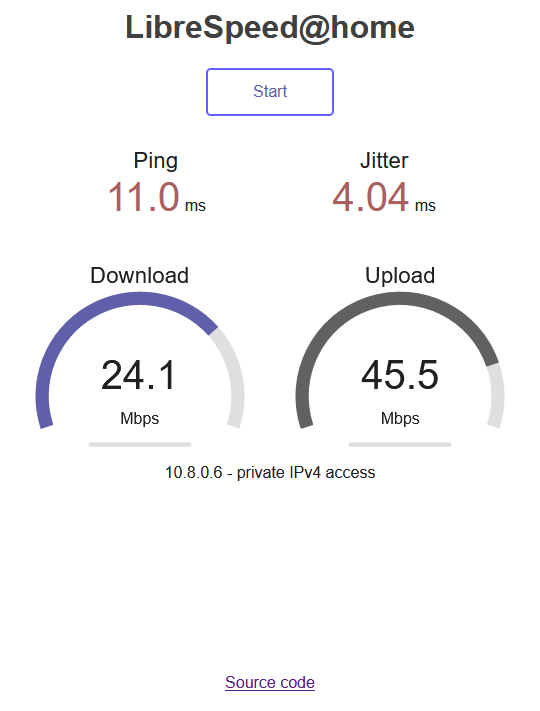
This is a very lightweight speed test implemented in Javascript, using XMLHttpRequest and Web Workers.
No Flash, No Java, No Websocket, No Bullshit.
All modern browsers are supported: IE11, latest Edge, latest Chrome, latest Firefox, latest Safari.
Works with mobile versions too.
Remark: Since I do not want to store test results, nor share the results, we omit the part with installation of SQL and FreeType2 and will install only Apache2 and PHP.
Before starting the installation procedure, open a Terminal window and run the following commands to update your Pi:
sudo apt update && sudo apt upgrade -y
We are going to install Apache2, which is the most famous web server software. To install Apache2, run the following:
sudo apt install apache2 -y
Once the Apache2 is installed you can test your installation. To do so, just go to the /var/www/html folder and there you should have an index.html file. "Opening" your Raspberry's IP in browser should look like this:
The next step is to install PHP, which can be done on Raspberry Pi with just simply run the following:
sudo apt install php -y
While installing LibreSpeed at home, I found a few recomendations by ThePiGuy, how to fine tune your Apache2 and PHP setup. You will need to check if Keep-Alive is enabled in /etc/apache2/apache2.conf and if not you should set it to "KeepAlive on".
In order to increase the size limit/memory limit of PHP you have to open
/etc/php/7.0/apache2/php.ini and do the following modifications:

max_execution_time = 90
max_input_time = 90
memory_limit = 128M
post_max_size = 50M
upload_max_filesize = 50M

If all is done, then you can restart Apache:
service apache2 restart
Now you can check if there is Git installed by typing:
git --version
If you have it, that is Ok, if not, simply install it by:
sudo apt install git
The next step is to clone the LibreSpeed repo via a few sequential commands:
With all the LibreSpeed needed structure in place we can choose one of the example designs for our home speedtest page. Just copy it as index.html (I used example-singleServer-gauges.html).
The final step is to set up a new virtual host. Using ThePiGuy and DigitalOcean tutorials it was easier. In folder /etc/apache2/sites-available create file speedtest.conf and add to the file the following content:
To enable the new virtual host we will use the a2ensite tool to do it, by typing:
sudo a2ensite speedtest
Before reloading Apache server, disable the default site defined in 000-default.conf by using the a2dissite command:
sudo a2dissite 000-default.conf
and restart Apache to make these changes take effect:
sudo systemctl restart apache2
That is all. Mine looks like this: